You Are Ready to Begin! Sourdough Tools and Tips: Keep it Simple!

by Mary Helen Rychlak

Once you have accepted your fate, you are really doing this! There are a few handy tools that will be helpful to have as you get started. You don’t need much. Keep it simple! In fact, many of these items you may already have in your kitchen.

Once you get your starter up and running, whether you create your own, rehydrate a starter, or are gifted a living starter, you will need a container to hold your newest addition to the family.
For the first year of my sourdough journey, I kept Dough-lene (my starter) in a standard mason jar with a rubber band wrapped around it. The rubber band helps you mark how much the starter rises after a feed. Simply mark the spot when you feed your starter and you will be able to track how much it rises. Once it is all bubbly and has doubled or hit its peak—you are ready to use it to bake!
A mason jar works just fine to house your starter! Some tips to remember when using a mason jar: you will want to be sure to keep it slightly cracked, so your starter can “breathe.” Every two weeks or so, I would recommend moving your starter during a feed to a fresh jar and washing the old one out. I also like to keep a few mason jars on hand to use for my sourdough discard, since I repurpose it in many other recipes. Your discard can be left in the fridge for when you are ready to use it. If you aren’t going to use it, throw it out in a trash can. Never put large amounts of discard down the drain, or you are looking to rack up an expensive plumbing bill!
Now, if you are looking for something more elevated, I recommend purchasing your jars from a company called “SourHouse.” I was gifted their awesome jars from my mom. The jars are made especially for sourdough. They are great because unlike traditional mason jars, they do not have a screw top. Instead, the jars have a straight and smooth interior and exterior from top to bottom without any ridges. This helps prevent dry starter from building up along the edges, which gets all crusty. I find I need to change out my jars less using these specialty jars. They also come with a silicone lid that helps your starter “breathe”. Another perk of this company is that their products come with a digital sourdough community recipe book with tons of great recipes! You can check out their website here.
Digital Kitchen Scale
Digital Kitchen Scale Digital Kitchen Scale
If you are anything like me, you probably grew up using cups, tablespoons, and pinches of salt. It is the age-old debate – U.S. customary vs the metric system! I have found that in baking you need to be precise, and the metric system works best for me.
When measuring using cups of flour, the measurements can vary from scoop to scoop. There will always be packing, clumping, a few extra particles in one scoop vs. another. Measuring with a kitchen scale, you can get as close as possible to the exact amount every time, because you are basing it on mass. Additionally, it saves on dirty dishes! Imagine this! You place one bowl on a scale and with each measurement you zero out the scale. You use the ingredient directly from its container into the mixing bowl. Bam! You have only one bowl! No dirty teaspoons, tablespoons, or cups.
Do not be intimidated by the digital scale. Once you buy in, you will never go back! Throughout your journey, you will find most sourdough recipes will be measured in grams, so buying into the digital scale will save you the headache of conversions. It also can help you perfect feeding your starter. I think you’ll find (much like me) you will prefer measuring with a kitchen scale. You will begin to use it for more than just baking and it will quickly become a kitchen staple.
You can find the one I use here, but there are many great options available!
Bowls and Baskets
As you begin to make your dough, you will have steps that require a mixing bowl and a proofing basket.
In terms of bowls. I have learned (from my extensive TikTok and Instagram Reel research) that sourdough + reactive metals is not best! I recommend glass or ceramic bowls to avoid any reactive metals and those pesky microplastics in plastic bowls (personal preference)! You will want to find a large mixing bowl that is wide and deep. Because you are mixing with flour, if the bowl is not deep enough, your flour might go everywhere when you are mixing if you do not have enough depth in your bowl. I have a great ceramic set from William Sonoma.
As for proofing, you will want to purchase a banneton basket to hold your bread. Banneton baskets will be used after shaping and during proofing and help hold the shape of the dough. There are many varieties. I own both a boule-shaped and bâtard-shaped banneton Boule-shaped loaves are perfect for adding inclusions and gifting. It also makes a beautiful loaf that you can make creative designs during scoring. I like the bâtard-shaped best to make bread for myself. I can get more uniform slices working with this shape for my everyday bread. I purchased both baskets on Amazon, which has multiple options. I prefer using the baskets that have a cloth lining, but there are also silicone versions, which you can see here.
Shaping Mat
One of the best tools I discovered after about a year of baking is my silicone baking mat. This purchase has been a game-changer for my kitchen!
Before purchasing this mat, I was struggling to shape my bread on a wooden cutting board. It was difficult to do because the cutting board had little surface area, it got sticky, and it would shift all around as I shaped my dough. While some home bakers prefer to shape directly on their granite kitchen counters, I could not find a food-grade kitchen cleaner I felt comfortable with cleaning the surface I shape bread on.
So, I did some research and found that you can purchase large silicon baking mats. The great thing about them is they stick well to your counter and don’t shift around like my cutting board did. Also, you have a lot of surface area to work with. And because they are silicone, my dough glides over the surface as I shape. In addition, I can easily clean it with warm, soapy water without having to worry about any cleaning sprays. The one I purchased is versatile! I find it is helpful for many of my other recipes, such as my “Melz-itz” and my sourdough discard tortillas.
You can find the one I have here. I can guarantee this mat will be lifesaving when baking!
Scoring Tool
One of my favorite parts of sourdough baking is the score. It allows you to get creative. You can do something simple and beautiful, or you can do a fun design for a holiday or themed party. I have been known to score a football on a loaf during football season or make a beautiful Christmas tree score during the holidays!
You will need a scoring tool to create a beautiful score. I have used a few different varieties during my journey. I have found that the tools with the retractable blades are hard to clean and even rust. I would not recommend. My advice is to purchase a tool with a replaceable blade. I will use the blade a few times, with a gentle clean between uses, (be careful with the sharp blade!) then switch it out as it gets dull or begins to rust.
You can find the one I use here. Happy scoring!

A Dutch oven is not a requirement for baking sourdough loaves, but I will admit, purchasing a Dutch oven took my loaves from good to great! It is a must (in my opinion) for making high quality loaves. The biggest difference I noticed after using a Dutch oven, was the change in the crust of my loaves. A Dutch oven traps the heat and moisture to give your loaf extra spring and a crisp crust. The Dutch oven helped me achieve that crispy, flavorful crust sourdough is known for!
Dutch ovens are a big investment, and take up a lot of kitchen real estate, but I think you will find them a welcome addition to your kitchen. Dutch ovens can be used for much than baking bread. I have use them to cook beautiful one-pot dishes, soups and stews for my friends and family. It is also an amazing tool for slow roasting meat. My brother-in-law makes an immaculate braised short rib in his. Trust me, it will be well-worth the investment.
When it comes to selecting your Dutch oven, there are a ton of amazing options out there! I own the 7 qt Lodge Cast Iron Dutch Oven which works very nicely. I have gifted the 5 qt Lodge to my mother, who also achieves beautiful loaves. My dream is to one day own a Le Creuset Dutch oven, which come in a variety of beautiful colors. Do a little research and you are sure to find a Dutch oven that is in your price range and fits your aesthetic.
Bread Knife
You have baked your first loaf! Now it’s time to serve! Ideally, a classic bread slicer can give you beautiful evenly sliced bread. But they can be very pricey and take up a lot of kitchen real estate, especially for people like me with a small one-bedroom apartment. Let me put you onto something, a Bread Bow!
A Bread Bow is an awesome serrated bread knife. It is designed for you to you apply minimal pressure to slice pieces of bread, which I find helpful with tough crispy crust of sourdough loaves. Check out the Bread Bow here.
Other Notable Tools
Danish Dough Whisk – a helpful tool when mixing dough, though not necessary. Clean hands will do the trick!
Small Silicon Scrapers – a helpful tool when feeding starter and scraping the sides to keep the jars clean between feeds.
Bread Bags – give gifting bread that special touch.
Pro-Tip: get personalized stickers made on Etsy to seal your bags. I use LittleMagicPrints!
As you begin your journey, remember you don’t need much to bake beautiful and delicious sourdough loaves. I hope you will find the tools listed a helpful starting point. Happy baking! And be sure to follow along for more sourdough baking tips!
1
Searing the Beef
Sear beef fillets on high heat for 2 minutes per side to form a golden crust. Let it cool before proceeding to keep the beef tender.
1
Searing the Beef
Sear beef fillets on high heat for 2 minutes per side to form a golden crust. Let it cool before proceeding to keep the beef tender.
1
Searing the Beef
Sear beef fillets on high heat for 2 minutes per side to form a golden crust. Let it cool before proceeding to keep the beef tender.
1
Searing the Beef
Sear beef fillets on high heat for 2 minutes per side to form a golden crust. Let it cool before proceeding to keep the beef tender.
Notes


1
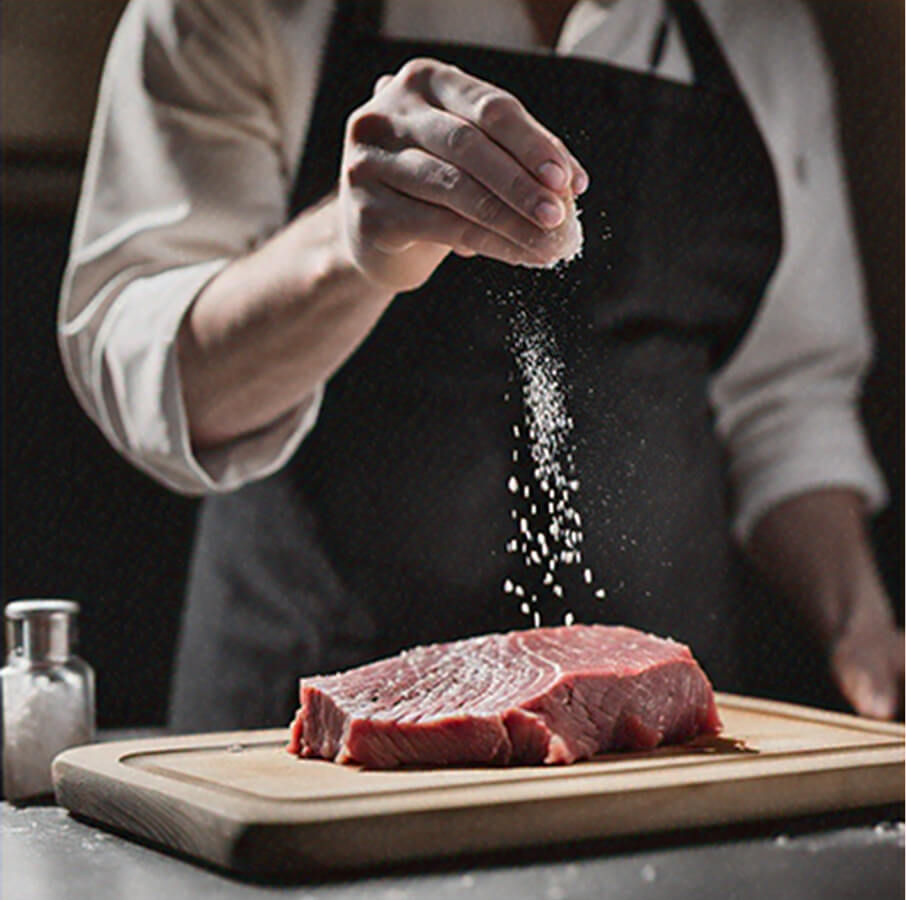
Season the good fresh beef fillets with salt and black pepper. Heat olive oil in a pan over high heat and sear the fillets for 2 minutes per side until it fully browned. Remove the beef from the pan and brush with a thin layer of mustard. Let it cool.
1
Season the good fresh beef fillets with salt and black pepper. Heat olive oil in a pan over high heat and sear the fillets for 2 minutes per side until it fully browned. Remove the beef from the pan and brush with a thin layer of mustard. Let it cool.
1
Season the good fresh beef fillets with salt and black pepper. Heat olive oil in a pan over high heat and sear the fillets for 2 minutes per side until it fully browned. Remove the beef from the pan and brush with a thin layer of mustard. Let it cool.
1
Season the good fresh beef fillets with salt and black pepper. Heat olive oil in a pan over high heat and sear the fillets for 2 minutes per side until it fully browned. Remove the beef from the pan and brush with a thin layer of mustard. Let it cool.
Instructions
Quality Fresh 2 beef fillets ( approximately 14 ounces each )
Quality Fresh 2 beef fillets ( approximately 14 ounces each )
Quality Fresh 2 beef fillets ( approximately 14 ounces each )
Beef Wellington
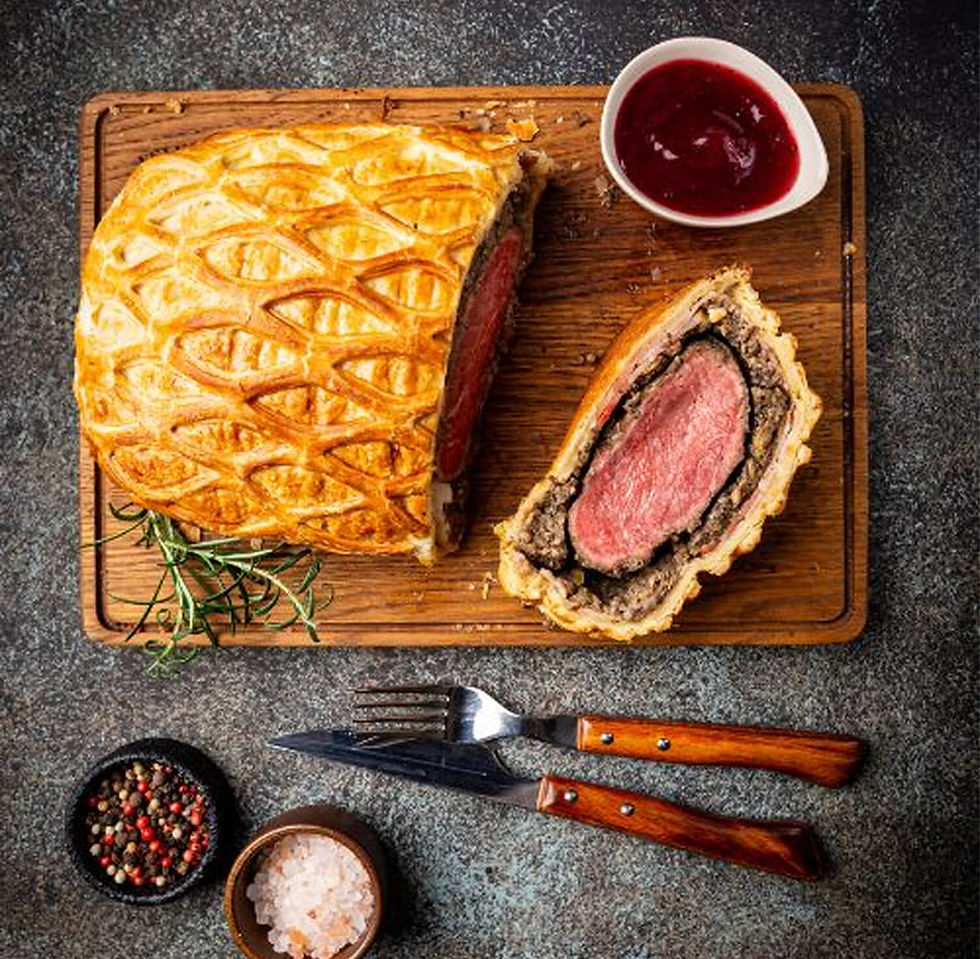
Beef Wellington
Fusion Wizard - Rooftop Eatery in Tokyo
Author Name

Beef Wellington is a luxurious dish featuring tender beef fillet coated with a flavorful mushroom duxelles and wrapped in a golden, flaky puff pastry. Perfect for special occasions, this recipe combines rich flavors and impressive presentation, making it the ultimate centerpiece for any celebration.
Servings :
4 Servings
Calories:
813 calories / Serve
Prep Time
30 mins
Prep Time
30 mins
Prep Time
30 mins
Prep Time
30 mins


Comments