My Sourdough Journey: A Realistic Approach for a Girl on the Go

By Mary Helen Rychlak (@Chef.Melon)

Welcome to my sourdough journey—real-life baking, tasty baked goods, and plenty of experimenting along the way!
Think you are ready to start your sourdough journey? Buckle up! Only kidding… After beginning this journey, you may come to find sourdough baking really isn’t as intimidating as it may seem. And you will find along the way, as I did, that there is so much that little jar of flour and water is capable of.
How It All Began
Unlike many others, my journey did not start during Covid. At the beginning of 2024, I had just moved to a new city, didn’t have many friends (yet), and needed something to fill the extra time around my one-bedroom apartment. I always dreamed of getting into baking. I already loved cooking, and I figured that love might transfer over to baking. Additionally, over the years, the ingredients list on store-bought bread was getting longer and longer. It was starting to really bum me out how many additives were incorporated into the breads they were selling. Reading the ingredients lists, I began to wonder, “Is this even bread
anymore?”
Learning as I Go
One day, I decided it was time to begin my sourdough journey. But where to start? I decided to look up videos on TikTok (of all places!), and I found an entire page dedicated to sourdough - @TheSouthernSourDough, where a friendly creator named Jenn teaches all things sourdough while balancing being a mom and a busy schedule! She taught me how to create my own starter from scratch, which I ended up doing! She also encouraged beginners to name their starter, which led me to bestow the iconic name “Dough-lene” to my newly made starter. My beloved Dough-lene is still kickin’ today and has even been shared with my mom, who has also begun her own sourdough era!
From @TheSouthernSourDough’s videos, I learned to bake loaves, add inclusions, and got a good idea of all the helpful kitchen tools that I would need to order to bake sourdough loaves. I ended up purchasing her loaf recipe, and I used that as a guide throughout the beginning of my practice. I have since tweaked my recipe a bit, but Jenn really helped me get my start. And it was amazing how much I learned watching her on TikTok!

Practice makes progress - a look at some of my later loaves.
I jumped right in and began making dough every day. I became more and more comfortable working with sourdough. I learned how to feed my starter, when to use it during its “peak rise,” and how to take care of it when I am not actively using it. Were they perfect every time? No! Are they perfect today? No!
You will find some creators online who have it down to a perfect science, calculating every speck of flour. I, on the other hand, take a more fluid approach. Being a full-time teacher with side hustles and a busy social life, I squeeze baking into the equation where I can. One of my favorite things about sourdough baking is that it is very forgiving. Even if you don’t get the peak rise, or if your dough overproofs slightly, you will still create a delicious loaf for your family and friends. I like to take a realistic approach to home baking, and I want to show you it is possible to make delicious bread that everyone will love even with a busy schedule.
Beyond the Basic Loaf
As I learned how to make loaves, I began experimenting with inclusions like jalapeño cheddar, chocolate chip, cinnamon sugar, blueberry lemon zest, and pepperoni mozzarella. These inclusions elevated my loaves and allowed me to pair them with meals or use them for a decadent breakfast. If you can dream it, you can include it!
Blueberry lemon zest - one of my favorite inclusion experiments.
Cinnamon sugar sourdough. A wonderful addition to the breakfast table!
I moved on to experimenting with other baked goods such as bagels, English muffins, and dinner rolls, which I absolutely love sharing with family and friends, especially during the holidays! Shoutout to my dinner rolls this past Thanksgiving - a huge hit!


And for a little bit of Holiday fun...


As I got more comfortable baking breads, I was ready to learn what else I could do. Let me tell you - there is A LOT out there to learn about sourdough baking.
Don’t Toss the Discard
One of my favorite things I discovered along the way is sourdough discard! You might be wondering, “What is discard and why does it sound like something we shouldn’t bake with!?” Sourdough discard is the portion of starter you remove before feeding your starter. Oftentimes, you would throw this out to keep your starter from growing out of control. But here is the fun part - you can actually repurpose it in dozens of recipes.
Some of my favorite recipes have come from learning about how to use the discard. Some of these recipes include my cherished “Melz-itz” recipe (fan favorite!), homemade tortillas, pizza crust, cinnamon rolls, and so much more!

Some other way's I've put my sourdough discard to good use...


Luckily, with the rise of TikTok and Instagram Reels, there is so much out there to learn and share about sourdough baking. It is a community in itself! I have loved learning from other creators, and now I feel confident in creating my own recipes, taking bits & pieces of what I have learned from this fabulous online community and making my own path.
If you are ready to begin your sourdough journey, I am here to help! This page will give you all the tips and tricks you will need to bake beautiful sourdough loaves and other bakery staples without the sweat! Along the way, I will share some fun discard recipes you may have never thought to make before. If your family is anything like mine, they’ll be demanding more!
So, are you ready to begin your sourdough journey?
@TheSisterKnives Exclusive
1
Searing the Beef
Sear beef fillets on high heat for 2 minutes per side to form a golden crust. Let it cool before proceeding to keep the beef tender.
1
Searing the Beef
Sear beef fillets on high heat for 2 minutes per side to form a golden crust. Let it cool before proceeding to keep the beef tender.
1
Searing the Beef
Sear beef fillets on high heat for 2 minutes per side to form a golden crust. Let it cool before proceeding to keep the beef tender.
1
Searing the Beef
Sear beef fillets on high heat for 2 minutes per side to form a golden crust. Let it cool before proceeding to keep the beef tender.
Notes


1
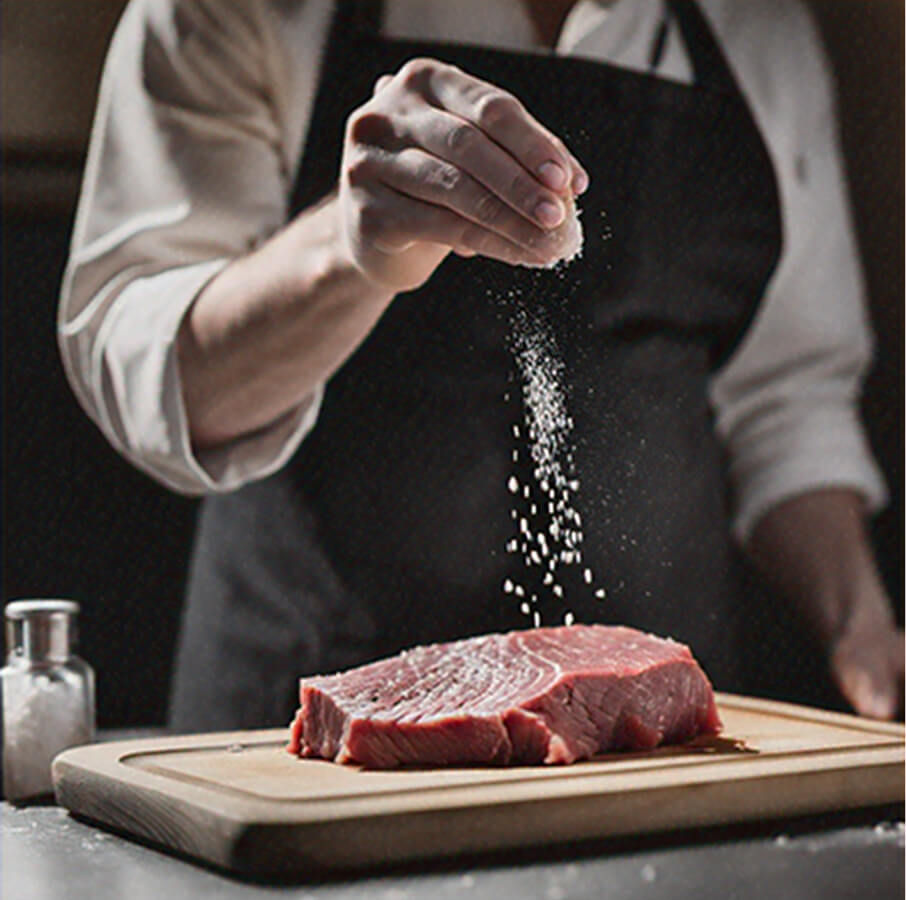
Season the good fresh beef fillets with salt and black pepper. Heat olive oil in a pan over high heat and sear the fillets for 2 minutes per side until it fully browned. Remove the beef from the pan and brush with a thin layer of mustard. Let it cool.
1
Season the good fresh beef fillets with salt and black pepper. Heat olive oil in a pan over high heat and sear the fillets for 2 minutes per side until it fully browned. Remove the beef from the pan and brush with a thin layer of mustard. Let it cool.
1
Season the good fresh beef fillets with salt and black pepper. Heat olive oil in a pan over high heat and sear the fillets for 2 minutes per side until it fully browned. Remove the beef from the pan and brush with a thin layer of mustard. Let it cool.
1
Season the good fresh beef fillets with salt and black pepper. Heat olive oil in a pan over high heat and sear the fillets for 2 minutes per side until it fully browned. Remove the beef from the pan and brush with a thin layer of mustard. Let it cool.
Instructions
Quality Fresh 2 beef fillets ( approximately 14 ounces each )
Quality Fresh 2 beef fillets ( approximately 14 ounces each )
Quality Fresh 2 beef fillets ( approximately 14 ounces each )
Beef Wellington
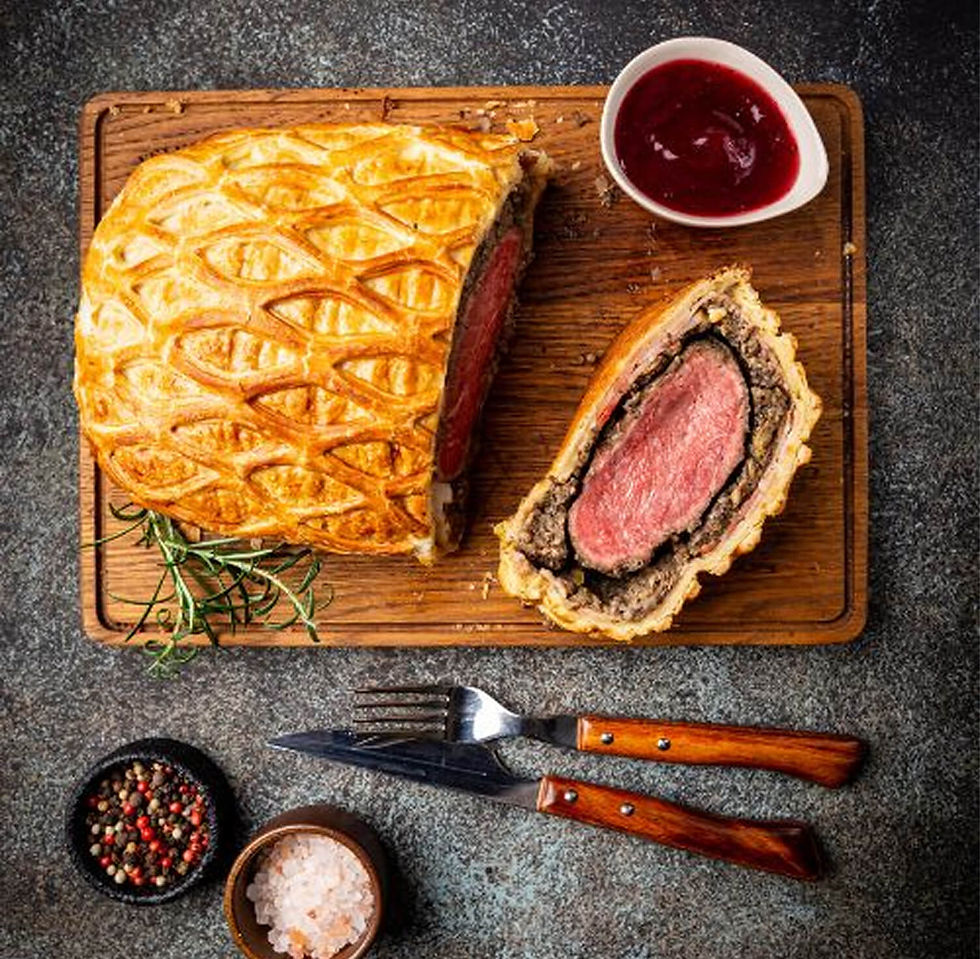
Beef Wellington
Fusion Wizard - Rooftop Eatery in Tokyo
Author Name
%20(1).jpg)
Beef Wellington is a luxurious dish featuring tender beef fillet coated with a flavorful mushroom duxelles and wrapped in a golden, flaky puff pastry. Perfect for special occasions, this recipe combines rich flavors and impressive presentation, making it the ultimate centerpiece for any celebration.
Servings :
4 Servings
Calories:
813 calories / Serve
Prep Time
30 mins
Prep Time
30 mins
Prep Time
30 mins
Prep Time
30 mins


Comments